[node.js] 비밀번호 초기화 API 구현하기
개요
node.js를 기반으로 비밀번호 초기화 API를 구현한다.
목차
소개
1. Email 검증 및 Token 생성
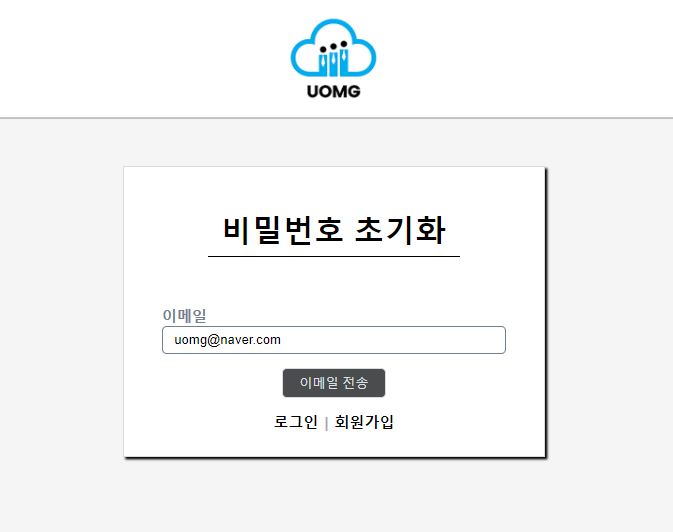
HTML 페이지에서 비밀번호를 재설정 할 Email과 함께 POST 요청


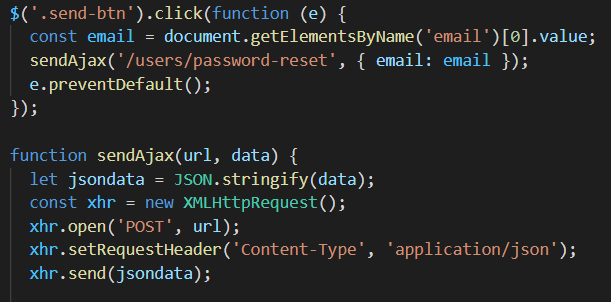
왼쪽의 이메일 전송 버튼을 클릭하여 서버로 POST 요청을 보낸다.
Email 검증 및 Token 생성
app.post('/password-reset', function(req, res) {
	//Database에서 요청받은 Email이 존재하는지 확인
	const emailId = await UserStorage.verfiedEmail(req.body.email);
	if (emailId) {
		// Data가 존재한다면 해당 Email의 id 값과 생성한 token 및 TTL(Time To Live)
		// 값을 인자로 하는 parameter을 생성하여 Database에 입력
		const token = crypto.randomBytes(20).toString('hex');
		const data = [emailId[0].id, token, 300]; //token, email의 userId, TTL 값
		await UserStorage.createAuthToken(data);
		//...(아래에서 계속 진행)
	} else {
		return res.send({success:false, message:'존재하지 않는 이메일입니다'});
        }
2. nodemailer module을 통해 비밀번호 초기화 링크 전송
Nodemailer Module을 통해 비밀번호 초기화 링크 발송
	const transporter = nodemailer.createTransport({
          service: 'gmail',	//gmail service 사용
          port: 465,	//465 port를 통해 요청 전송
          secure: true,	//보안모드 사용
          auth: {	//gmail ID 및 password
            user: process.env.GMAIL_ID,
            pass: process.env.GMAIL_PASSWORD,
          },
        });
        const emailOptions = {	//비밀번호 초기화를 보내는 이메일의 Option
          from: process.env.GMAIL_ID,	//관리자 Email
          to: req.body.email,	//비밀번호 초기화 요청 유저 Email
          subject: 'OMG 비밀번호 초기화 메일',	//보내는 메일의 제목
          html:	//보내는 메일의 내용
            '<p>비밀번호 초기화를 위해 아래의 URL을 클릭하여 주세요.</p>' +
            `<a href="http://localhost:3000/users/reset/${token}">비밀번호 재설정 링크</a>`,
        };
        transporter.sendMail(emailOptions);	//요청 전송
        return res.send({success: true});
	});
});
이 때 Gmail 에서는 보안 수준이 낮은 애플리케이션 요청의 경우 접속을 제한하고 있으므로 해당 링크를 통해 보안 설정을 해주어야 한다. 이 때 보내는 메일의 본문에 비밀번호를 재설정 하는 페이지와 URL에 token 값을 함께 넘겨준다.
요청받은 메일 및 내용 확인


요청 받은 링크를 통해 해당 페이지에서 비밀번호를 새로 설정한다.
3. Token 값 검증 및 비밀번호 재설정
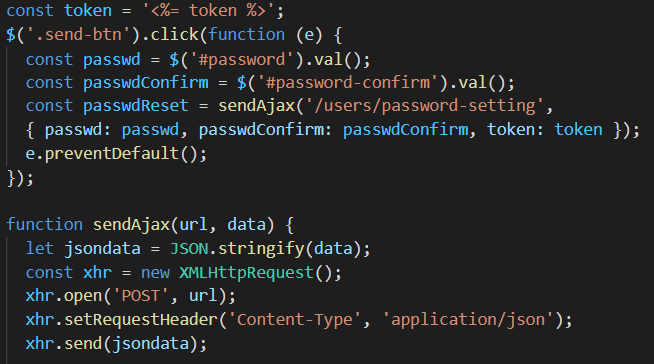
HTML 페이지에서 재설정 한 비밀번호 및 Token과 함께 POST 요청


링크를 통해 페이지로 이동 한 후, URL에서 parameter로 넘겨받은 token 값과 함께 서버로 POST 요청을 해준다.
Token 검증 및 비밀번호 업데이트
app.post('/password-setting', function(req, res) {
	try { //token을 검증하여주고, token을 생성한 userId를 얻어 해당 Id의 password를 재설정한 비밀번호를 암호화 하여 저장하여준다.
		const hashedPassword = crypto.createHash('sha512').update(req.body.passwd).digest('hex');
		const userInfoByToken = await UserStorage.getUserIdByToken(req.body.token); //DB에 해당 token이 존재하는지 확인
		const params = [hashedPassword, userInfoByToken[0].userId]; //token이 존재한다면 token을 생성한 userId를 가져옴.
		if (userInfoByToken[0].valid) {	//Token이 생성된 시간 + TTL 값이 현재 시간보다 작으면 token의 유효기간이 만료.
			const passwdResetResult = await UserStorage.settingPasswd(params);
			return res.send({success: true});
		} else return res.send({success: false, message: '비밀번호 재설정 시간이 초과되었습니다.'});
	} catch (err) {
		return return res.send({success: false, message: 'Error'});
	}
});
참고사이트
1. https://nodemailer.com/about/
Nodemailer :: Nodemailer
Nodemailer Nodemailer is a module for Node.js applications to allow easy as cake email sending. The project got started back in 2010 when there was no sane option to send email messages, today it is the solution most Node.js users turn to by default. Nodem
nodemailer.com
'Back End > Server' 카테고리의 다른 글
| [Server] Jwt Token vs Session -1- (Session편) (0) | 2022.10.14 |
|---|---|
| [Server] node.js 자동 로그인 구현 (Cookie + Session 활용) (2) | 2022.02.23 |
| [Server] Open API인 KaKao Map을 이용하여 위도 경도 얻기 (1) | 2022.02.10 |
| [Server] Open API인 KaKao Map을 이용하여 위치를 지도에 표시하기 (0) | 2022.02.06 |
| [Node.js vs Spring] Node.js vs Spring의 차이 (5) | 2021.12.28 |


